We are going to look at Microsoft Teams and how students and Teachers can use if for online learning and Teaching. This tutorial will also give you some tips and tricks about Microsoft Teams for Education.
What is Microsoft Teams?
Microsoft Teams is a collaboration tool that brings together several Microsoft Apps under one roof for Video Meetings, Calling, Messaging, Remote Working, File Sharing, Distance Learning e.t.c. It is accessible through Office 365 web app or Desktop Web app.
Pricing: Office 365 plans per user with Teams included start at $6 per month with office web apps only or $15 per month with both desktop and web office apps.
How to Create a Microsoft Team
To be able to use Microsoft Teams you must have Office 365. If you already have O365 account then follow the procedure below;
- Go to: teams.microsoft.com
- Login with your Username and Password
- After login, you will be presented with a Microsoft Teams interface
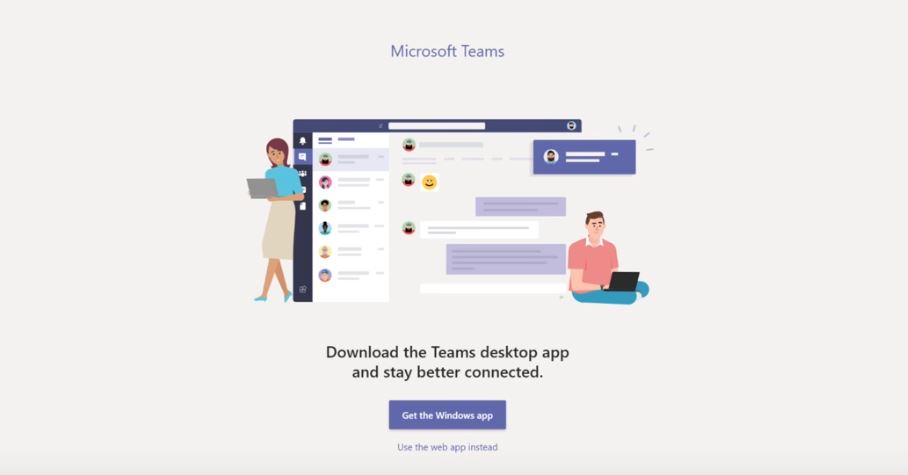
- Choose whether you want to use Teams on web App or Download Desktop App. We are going to use the web App for this demonstration as there is no notable difference between the two.
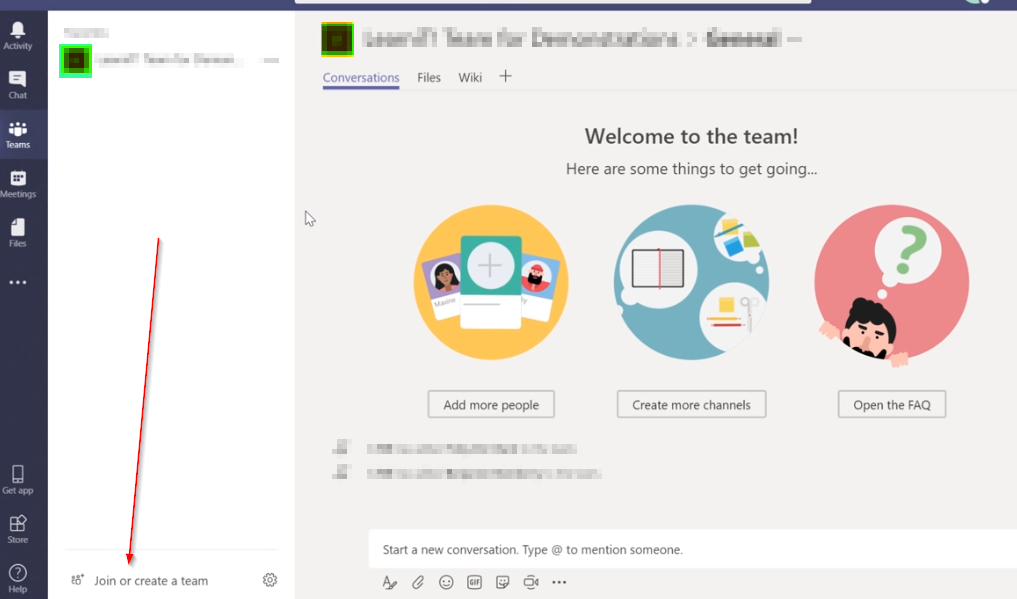
- Click Teams on the Left Menu
- On the Bottom Left, Click Join or Create Team
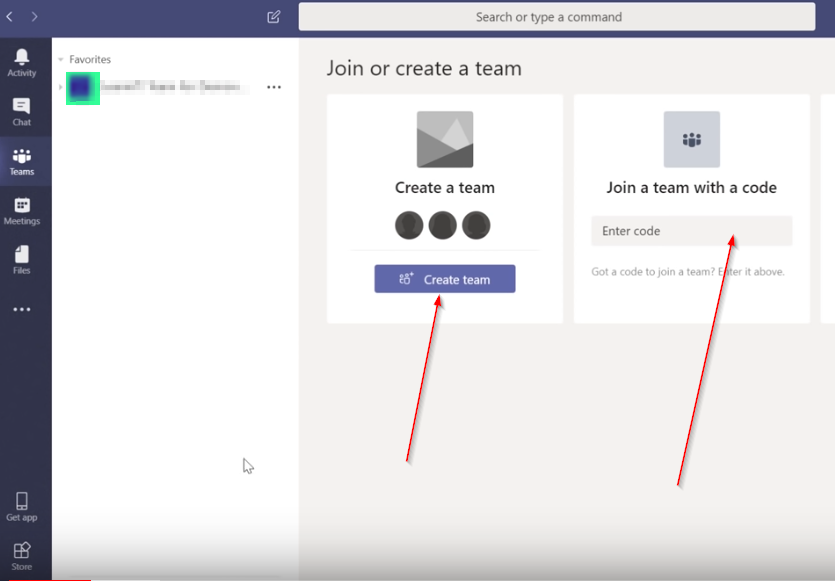
- Create Team or Join a Team with code.
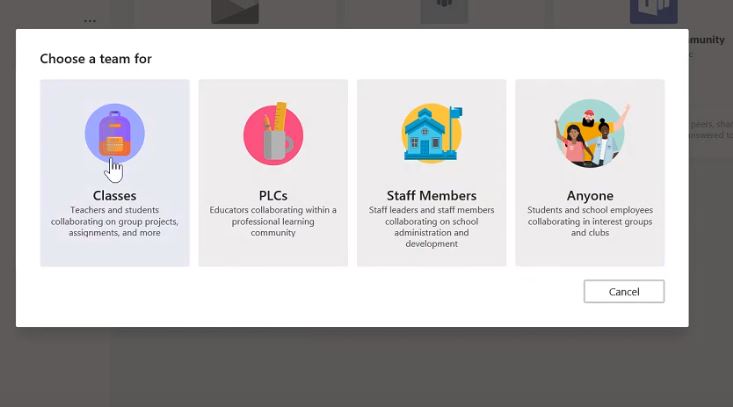
- Create Team for Education: In education you have five different types of teams that you can create (Classes, PlCs, Staff Members and Anyone). That should be setup by your professor or Head of Department.
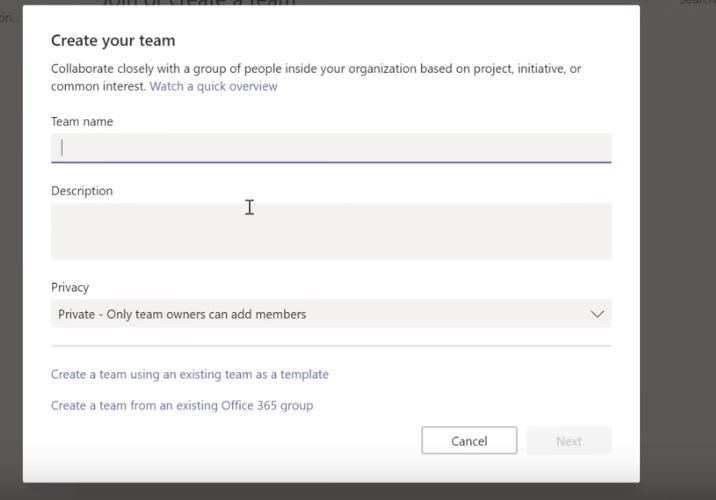
- Fill the details for the Team that you want to Create and click next
- Add Students to the Group
That is it for creating or joining a Teams Group
Team Management Capabilities
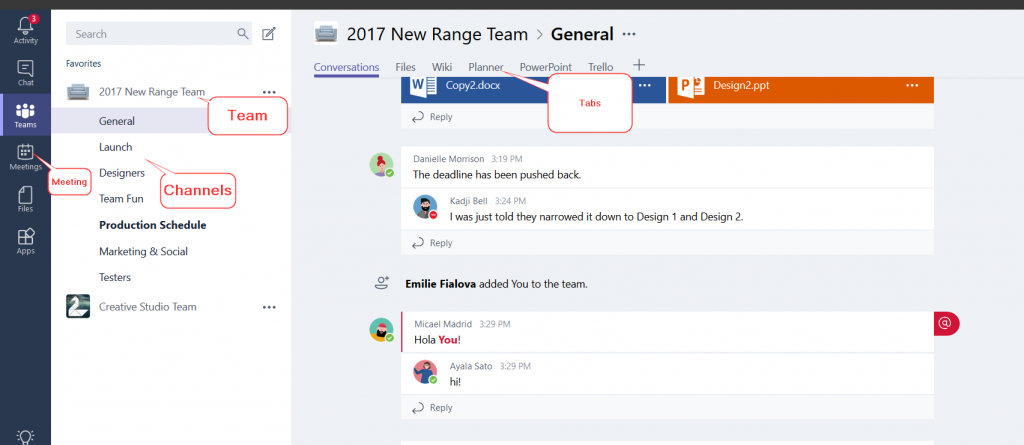
One you have created a team, there are different sections for you to manage;
- Channel
Inside a Team you can create channels. For instance, if you teach several subjects you can create a team, and then the channels will act as your subjects. In channels is where you share files, hold meetings and start conversations with your students. You can make a channel public or private.
- Meetings
You can start or schedule a video meeting inside channels by going to conversations then clicking Video tab
- Tabs
Add tabs to your channel to help your students with topic navigation
- Permission
Make sure that you have set permissions to prevent or allow students to create private channels
- Add Member
You can add new members to a team if you are the owner with their email or just send them a link to join a team.
- Apps
You can install apps like Forms, OneNote, SharePoint, Excel, Word, pdf, PowerPoint, etc. to be used by your team members.
- Archive
You can archive a team if it becomes inactive and you don’t want to delete it. Archived Teams remain in read only state.
Tips about Microsoft Teams
Conversation Privacy: Conversations started in channels will be visible to all team members. If you want to start a private conversation, click the Chat icon and select the member or members you want to see the chat.
Joining Meetings: Anyone can join your meetings by inviting them through url. Once they click the url, it will be opened on Microsoft Edge browser. This does not require any account or install.
Background Settings: You can blur your background in Teams Video Meetings.
Education: Teams for Education adds more options that are suitable for a learning setting. For instance, you will have the assignment tab just below files on the left menu.
Team Structure
Your team should be well organized to help your members navigate through easily. Below is an example of what I am referring to.
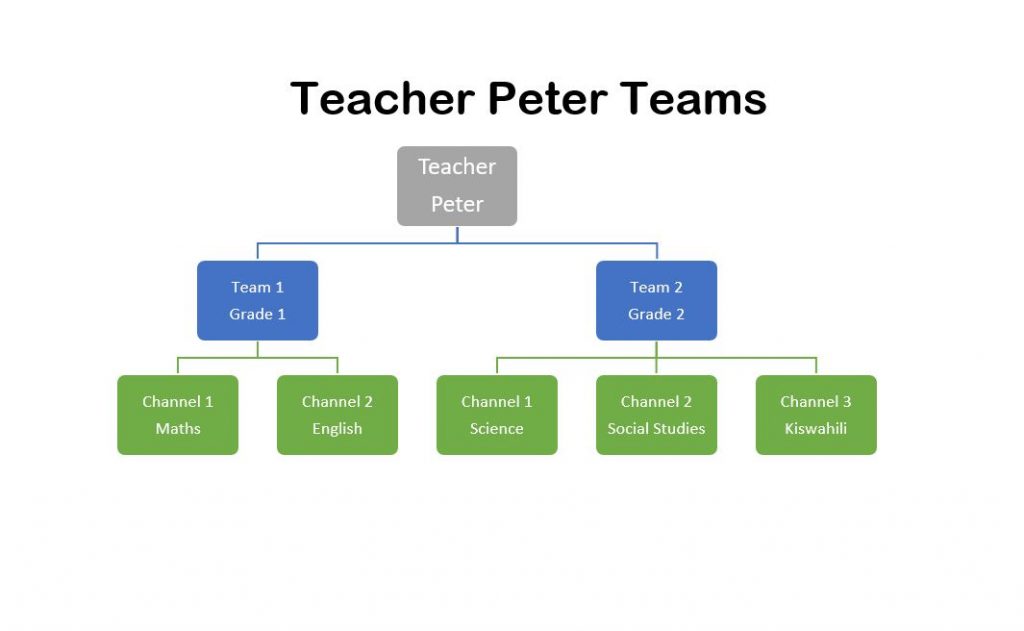
Important: Your Teams should be structured in a way that makes it easy for students to find and submit content. Do not place all you students who are studying different courses in one group. It will end up being messy, unhealthy and confusing.
More Remote Learning Resources: Google Classroom Tutorial or Google Meet for Online Learning or Zoom for Distance Learning.
Leave a Comment